|
Building a Fanbus
Page: 2/2 Now that you have all of the required materials, we can now move on to building our first Fanbus! Construction The first step in creating our fanbus would be to drill holes in the project box. The holes are there so you can slide your speaker terminals onto your project box, but we need to make way for those metal parts. So, place the speaker terminals onto the side of your project box, and use a pencil to mark the spot where the metal meets the box. This is where you will be drilling. You should have something that looks similar to the picture below once your done (if you look closely you can see the pencil marks hehe). Make sure to do this on both sides of the box, as we will have one speaker terminal on each side. 
After the marking is complete, it?s time to get your hands dirty! Bust out that hand drill of yours, and drill out the places you marked. Use a bit that is just slightly larger then the metal piece. Do this on both sides as well. Now you can see we?re getting somewhere. 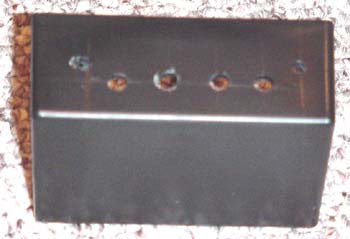
Now that the drilling is completed, you will now need to move on to the attachment of the speaker terminals. In most cases, you would use screws to attach the terminals to your box. But in this case, we will be going the ghetto route, and using good ol? Mister Super Glue! Squirt some of that goop between the end of the terminal and your project box, let it sit for about 10-15 minutes, and walla! Perform this on both sides as well. 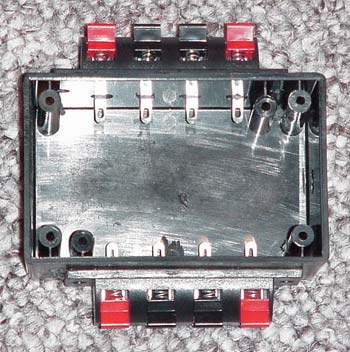
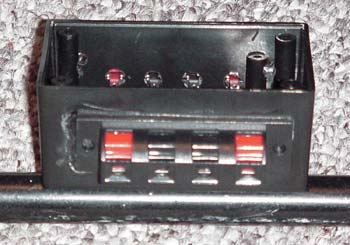
You?ll also need to drill one hole at the short end of your box. This will provide a hole for you to run the Molex connector out of your box. Now that the buff power tool man work is done, we can move on to the electronics aspect of the project. Plug in your soldering iron and let it warm up for about 10-20 minutes. The point of this is because you want that thing nice and hot for the soldering. Cut 4 pieces of 1? wire for the Black, and 4 pieces for the Red. Solder the Red wires onto each Red part of the Terminal, and solder the Black wires onto the Black part of the terminals. Now, if you want to make the guts of your Fanbus look fancy, place heatshrink over every place you soldered. Then, using a heat gun, or more likely a blow dryer, heat that stuff up and watch it shrink around the solder. It?s Magic! Next thing we need to do is create a 5 way solder job here. This is the way that the 4 fans route its power through one line. Now, cut a piece of Black wire, and a piece of Red. Both wires need to be about 4-6 inches, you decide, just make sure both wires are the same length. Solder the Black wire to the other four wires coming from the terminals, and do the same with the Red wire. I recommend twisting the four wires together, and then soldering the one longer wire to the bunch of four wires. You should get something looking like this when your half way through. 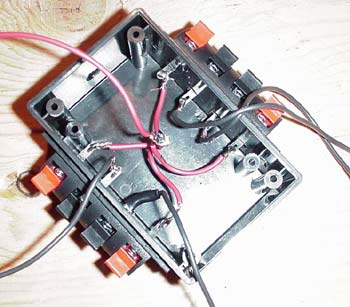
We?re almost home now! Throw some heatshrink over that stuff, and watch the magic yet again. Run those long wires out the hole on the end that you drilled earlier, and your ready for the next step. Now we need to finish it off with a Molex connector, so you can hook this sucker up to your PSU. Just take your Molex connector and solder your Red wire to Red wire, and your Black wire to Black wire. Make sure you put some heatshrink over that! 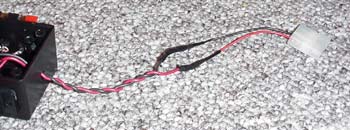
Now screw the top of your Project Box back on, and you should be ready to go! Connect that thing to some fans and watch it in action! 

This has been my first article written for TwistedMods.com, and I sure hope you guys enjoyed it! You will see me around more and more, as I get more and more articles published. If you have any questions or comments, make sure you email me at Vectrex@Twistedmods.com. Thanks! < Previous Page 1/2 |
||||||||||||||||||||


